

Once again it was time for me to make a LO using my page of the month kit from our LSS, Heartfelt Creations. The rules are to use everything in the kit, but nothing more. No paint, no stamping, nothing from your stash.
Here's what we got:

I really liked the double-sided paper that's green polka dots on the front and brown on the back. I wasn't such a fan of yellow cardstock - have you ever seen yellow on this blog??? - or the smooth blue cardstock. The whole point of joining this club was to challenge myself so I've really been loving every month so far.

Sketch from Sketchy Thursdays
As I've said before, the trick to making pages with few embellishments shine is to add visual interest with height and texture. The scalloped awning at the top was raised up with dimensional tape and the banner features lots of rough edges and curls to lift it off the page. Banners are very trendy right now so I thought I'd share the incredibly simple way I make them.
With this page, after cutting my mat, I had several long strips of paper leftover, lucky me!

Use a strip about as wide as you want your banner to be tall. Start by cutting an angled piece off one end of your strip. The marker is here for your benefit, don't draw a line, just cut.

Now you have this.

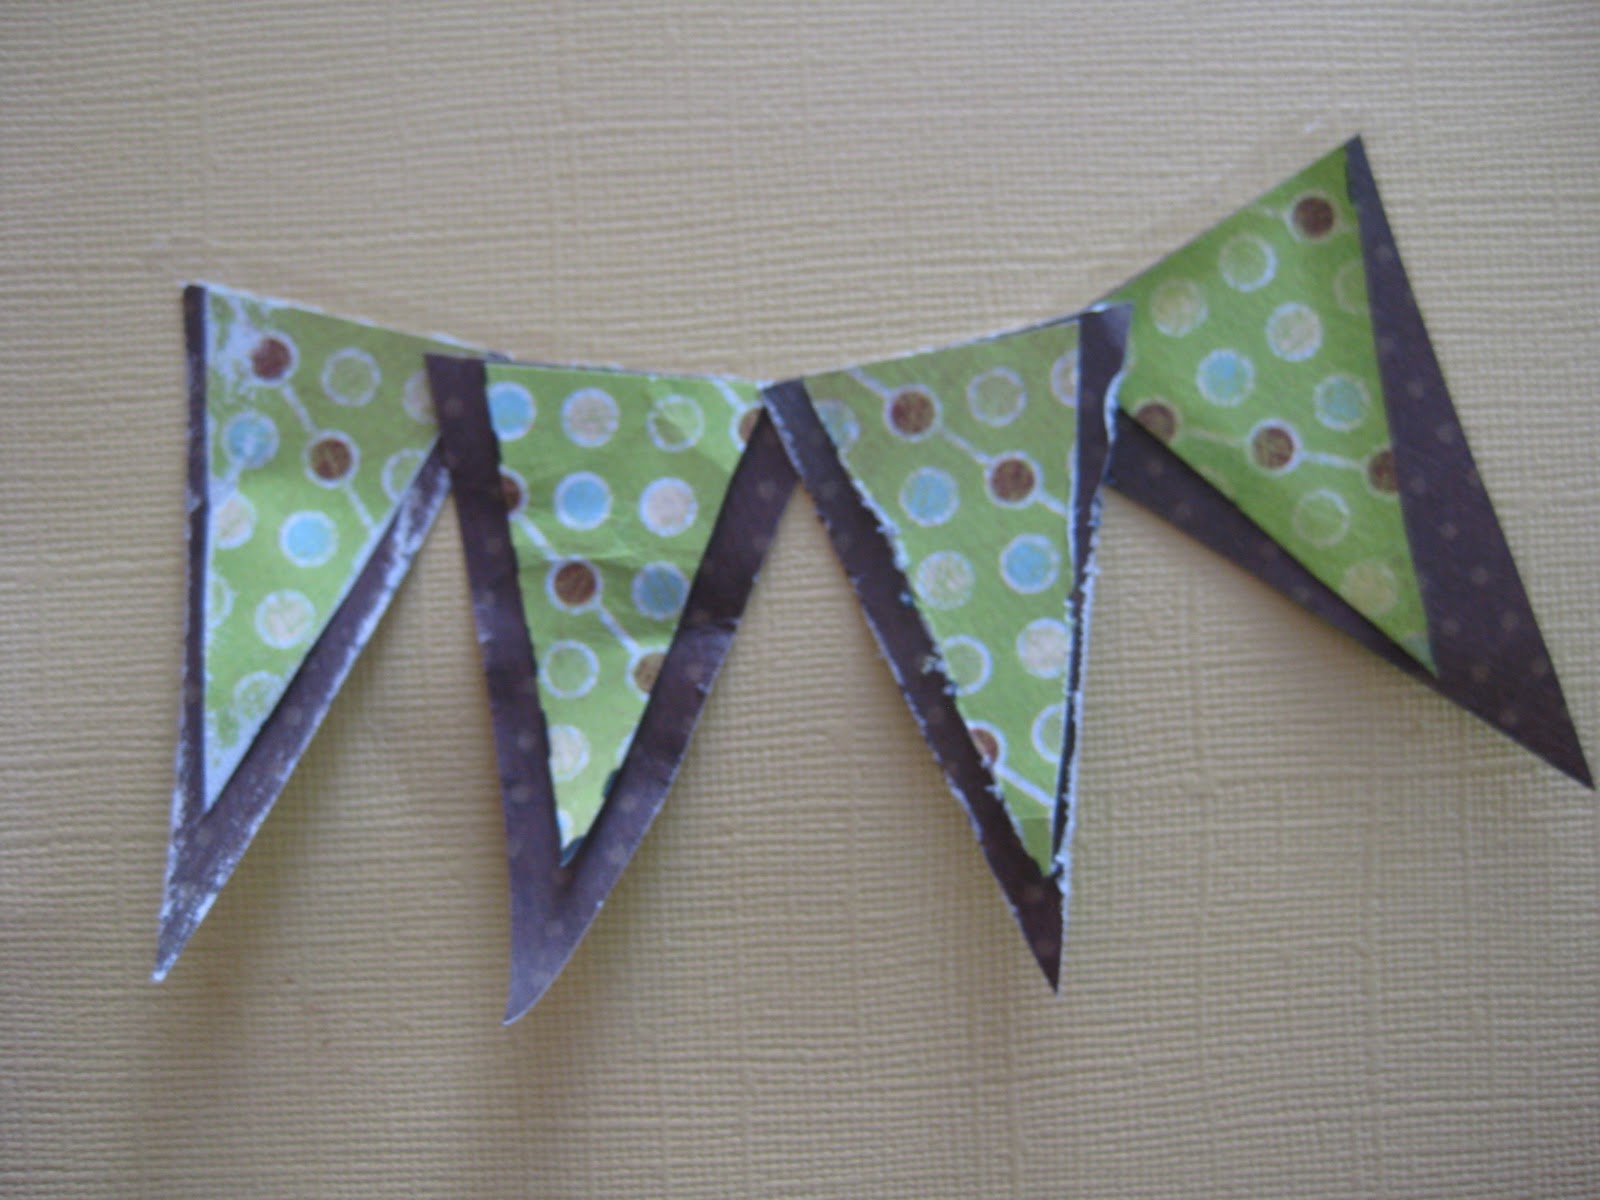
Cut as shown. Don't worry about them being even or perfect, imperfect seems to work better.

See how you this diagram shows five banners (not three)? Remember, you get twice as many as the number of cuts you make so stop when you have enough.

Now take the remaining piece of your strip and trim off a bit. What you're doing is creating a smaller pennant to be matted by the ones above. If you want a large border, cut off a larger strip.

Now repeat the cutting step. Your edge should already be angled so you don't need to repeat that.

Now stack them up. Have fun playing with the pairs for different looks.

At this point I like to distress and embellish my pennants. Here's a few simple ideas. I was constrained to the items in the kit but you could also add letters, jewels, buttons, rub ons, paint... sky's the limit.

Now to put it all together, make a smile with adhesive where you want your banner to go.

Attach your pieces making sure you overlap some of them and maintain a fairly smooth top line.
Cover the top edge with adhesive.

Attach ribbon, ricrac twine etc.

Add a button or flower.

Past Page of the Month Challenge Pages:


Thanks so much for stopping by.
9 comments:
Adorable page! Love it!
I think you did a fabulous job!!! I love challenges like this!
loving your page, the bunting detail is just fabulous!! Hugs Juls
I'm really impressed with your page, espcecially seeing what you were given to creat with. Wow!! You made th page look so full. Great work!
So cute!! I wish I was better at scrap booking!
I love the dimensional look of these! What a darling page.
ladybirdln.blogspot.com
Thanks for leaving me a comment on my Popcorn Valentine, I would love your recipe for Jello Popcorn you were talking about that sounds delicious!!
ladybirdln10@gmail.com
You ROCKED the sketch! This is awesome!!!! I loveeeeeeee that banner!! Thanks for using Sketchy Thursdays sketch! :):):):):):):):):):):):):):):):):):):):):):)
Beautiful page! that banner is so cool!
Thamnks for playing with the Sketchy Thursdays sketch!
Post a Comment